3. Semiconductor - Accuracy and Precision
What is a high-performance semiconductor metrology equipment?
Traditional "performance" can be divided into two types: “accuracy and precision,” or “trueness and repeatability.”
“Accuracy” is a measure of how close it is to the “true value.” On the other hand, “precision” is a measure of the variations of the values of a multiple number of measurements, and it is also called “repeatability.”
Please refer to the figure below.
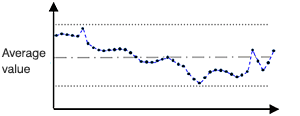
The left figure (Fig.3-1) shows a measurement result of a semiconductor device plotted on a time series.
If the same semiconductor object is repeatedly measured with a metrology system, the measurement result should always be the same.
But in reality, measurement values vary depending on the disturbance and noise.
The frequency distribution of the measurement values is shown in Fig.3-2.
When a large amount of measurement data are collected, the data distribution will approximate the Gaussian (normal) distribution, as in Fig.3-2. The features of the distribution are shown by Mean: μ (mu) and Standard Deviation: σ (sigma). The possibility that the data falls inside μ±3σ is 99.73%.
μ: Mean
σ: Standard Deviation

A small σ as in Fig.3-3 (a) means that the variation is small, and a large σ as in Fig.3-3 (b) means that the variation is large. When the variation is small, precision (or repeatability) is high (good).
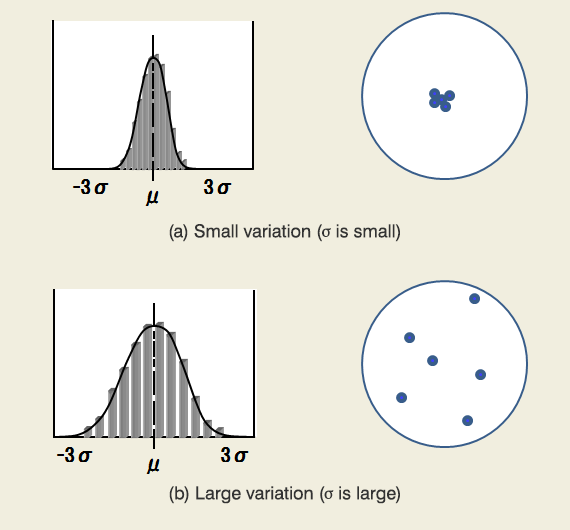
This can be compared to shooting at a target with a gun.
When variation is small, the bullet holes will remain within a small area (right figure of Fig.3-3(a)).
When variation is large, the bullet holes will spread over a large area (right figure of Fig.3-3(b)).
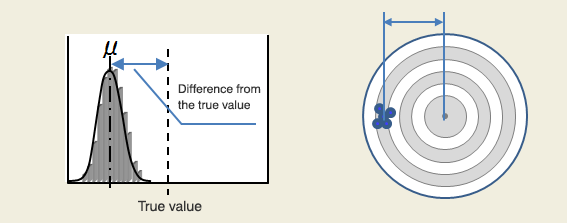
High repeatability does not guarantee a true value (a correct value or the target center). Fig.3-4 is an example of measurement values that are far from the true value (the target center).
When the mean value (μ) is close to the true value, the trueness or accuracy is high.
Below is a brief summary:
- A small variation (σ) means high (good) precision.
- A mean value (μ) close to the true value means high (good) accuracy.
This is illustrated in Fig. 3-5.
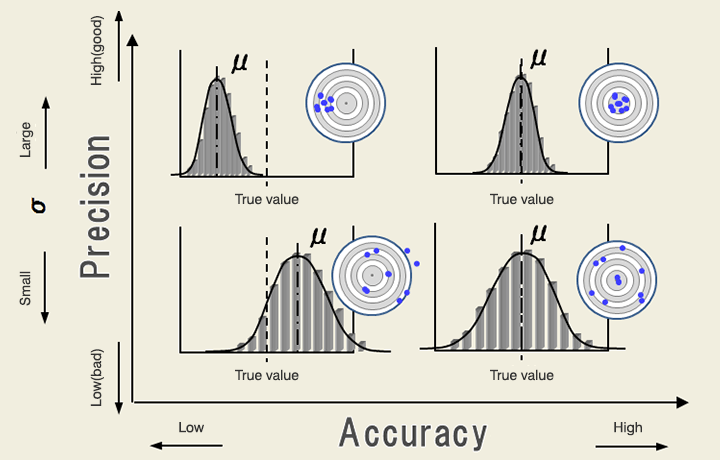
A measuring system like Critical Dimension SEM (CD-SEM) requires high precision.
A high precision system means a high performance measuring system. The CD-SEM has a measurement repeatability of about 1% of the measurement dimension in 3σ.
Accuracy can be adjusted by using a measurement standard such as a Standard Microscale for calibration to make the measurement value coincide with the true value.

